What will you need in your Corpse Bride makeup kit:
- Blue face and body paint - Paintglow UV Blue Face & Body Paint
- White face and body paint - Paintglow UV White Face & Body Paint
- Light blue face and body paint
- Translucent setting powder
- Eyeshadow palette with the following shades: navy blue, marine blue, light blue, black
- Black liquid eyeliner
- Nude-toned lipstick or lip gloss
- Zombie White Cosplay Coloured Lenses
Before you start creating this Corpse Bride makeup look, ensure your contact lenses have been removed from their packaging and are soaking in fresh multipurpose solution in a sterile contact lens case. We recommend soaking your lenses in this solution for a minimum of two hours before inserting them to avoid irritation.
Step 1: To create an even surface, use a makeup glue for face to flatten your eyebrows. Once you are happy with your eyebrow placement, set them with the translucent powder.
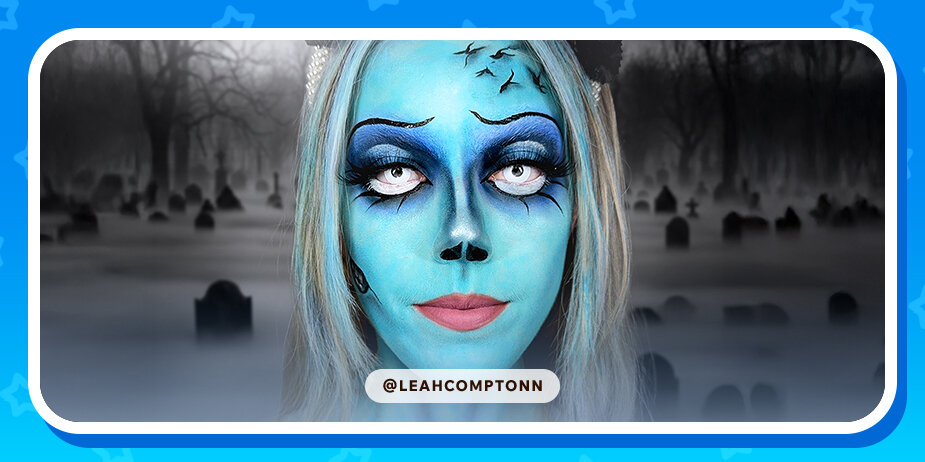
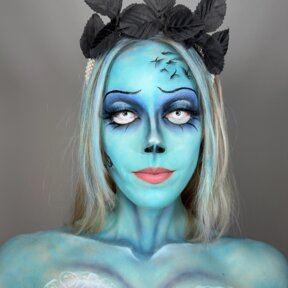
Step 2: To begin your Corpse Bride face and skin, apply your chosen blue face and body paint to your face and gradually work your way down the neck onto the chest. When applying your blue face paint, leave about 3-4cm around your eyes; this will make it easier to apply your other products later on. Leah chose to apply this using a makeup brush, but you could use one of our makeup sponges if you prefer. Apply the product to the back of your hand and gently dab your sponge in the paint and then onto your face and neck.
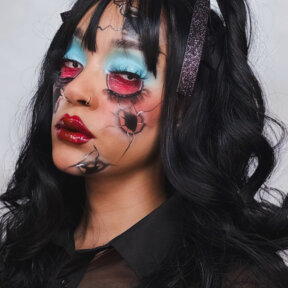
Step 3: Next, using the white face and body paint, carefully highlight the edges of the blue makeup around the eyes, gradually drawing it up towards the water line. Using the same white face paint, apply this to the center of both the chin and forehead to create a highlighted effect. Finish off your base by applying the light blue face paint to your eyelids and filling in the space; follow this by setting it with the translucent powder to create a matte finish.
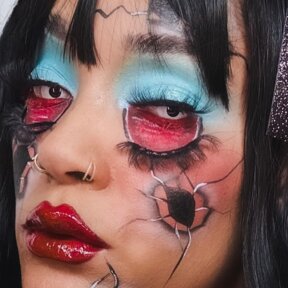
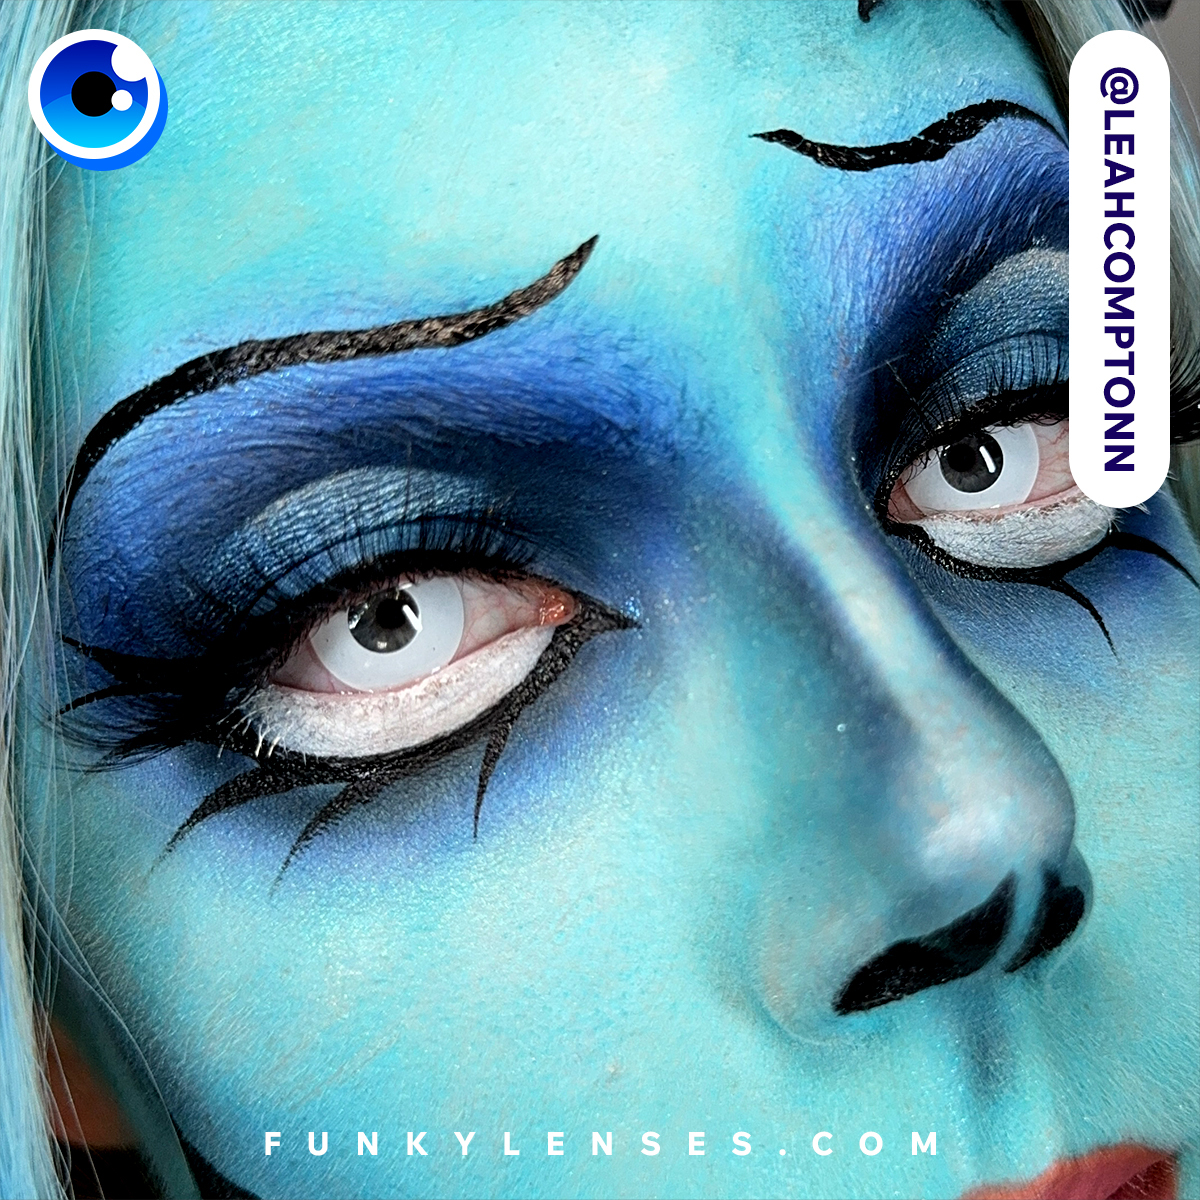
Step 4: Now that your base is complete, we move on to the eyes. Using the navy blue eyeshadow, gently carve out a curved shape and blend it up into the lighter-toned blue paint on your eyelids to create a gradient effect. Leave the center of the eyelids uncovered. Using the white face and body paint, take a small amount of white paint on a flat precision brush and create a highlighted center to your eyelid. Apply a dusting of light blue eye shadow to the white paint.
Step 5: Moving on to the contouring part of this Emily Corpse Bride makeup tutorial. Using the black eyeshadow and a fluffy brush, lightly create a dark shadow beneath your cheekbones. Even more lightly, glide the black eyeshadow down towards the chin until it is in line with the corners of your mouth. Use this same shade to contour the sides of the nose and the cupid's bow. Continue your contouring process with the black eye shadow by lightly applying the product to just below the hairline and onto the temples. To enhance the corpse-like appearance, create a contoured effect down the neck and onto the chest by using the black eyeshadow to add depth on either side of your throat and along the collar bones.
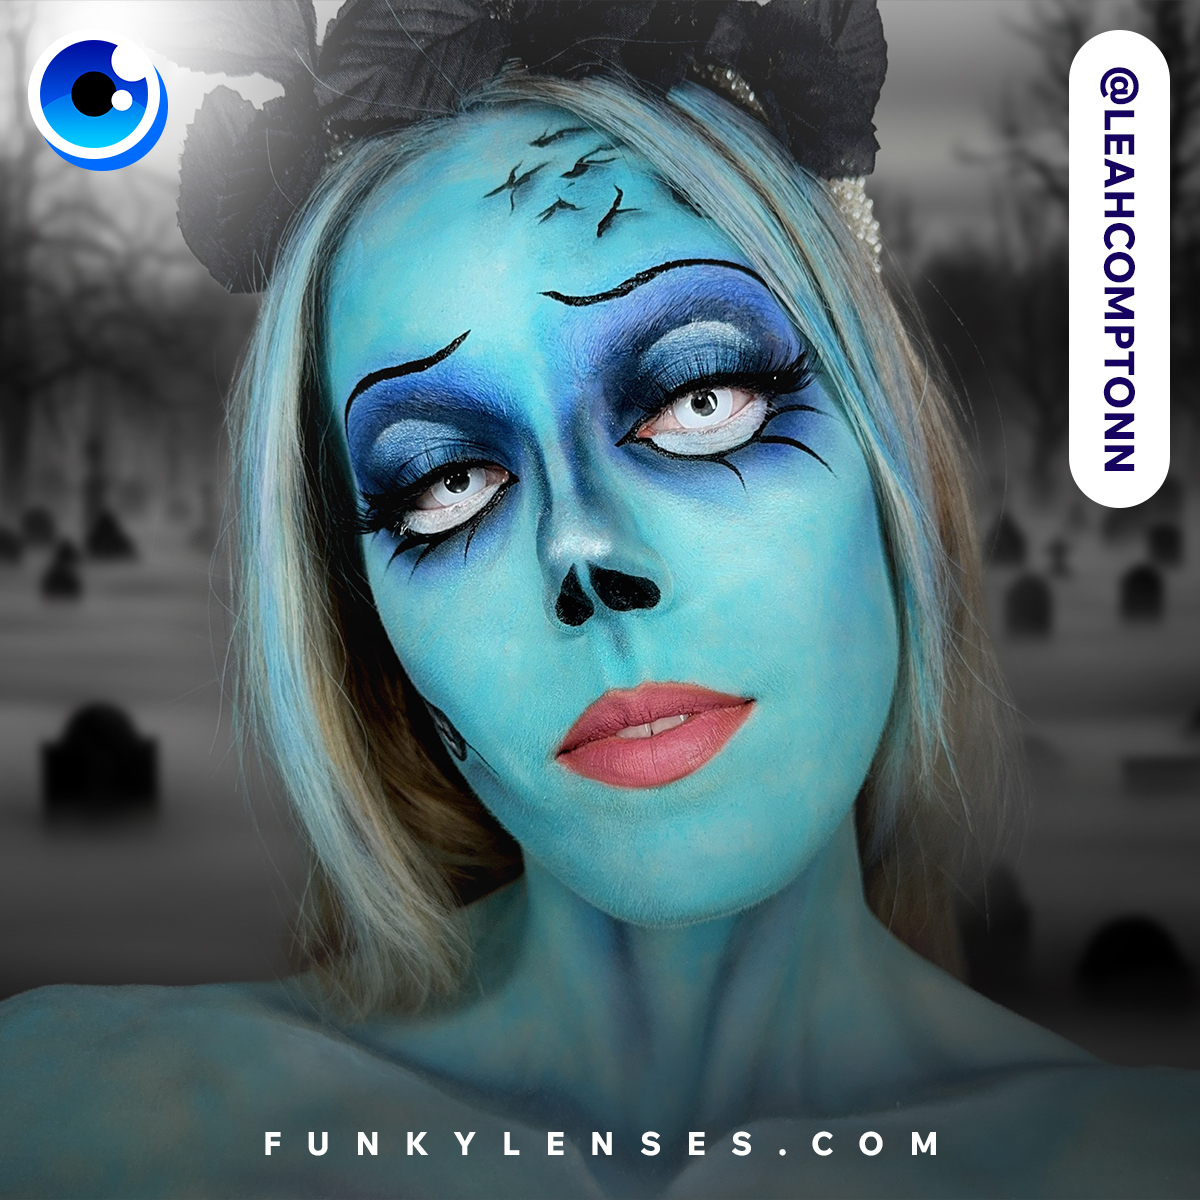
Step 6: Using your black liquid eyeliner, create the effect of decomposition on the forehead. Leah did this by drawing uneven lines to create a ‘flaking’ effect. Using the black eyeshadow, carefully highlight these details by applying the powder beneath the drawn-on lines. Using the same eyeliner, create a hollowed effect to the nose by enhancing the nostrils. Outline your own nostrils and extend up to the tip of your nose. If you want, you can add extra details to your Corpse Bride look to emphasize a corpse-like finish. Leah chose to paint teeth onto her cheek to create a frail and delicate appearance.
Step 7: Now, to finish your Corpse Bride eye makeup. Create a curved line using the black eyeshadow from the outer corner to the inner corner of your eye that remains about 1.5cm from the waterline. On the outer edge of this curve you have created, blend the same light blue eyeshadow used before right around the eye and fill in the gap you have created with white face paint to create the appearance of larger eyes.
Step 8: Take the black liquid eyeliner and draw on a cat eye, flicking it to the end of your eyebrow. Use the line to outline the white section you have just filled in under the eye; draw lower lashes onto this black outline. Finish off your look with a nude lip using either lipstick or lip gloss, or both!
With your makeup completed, finish your look by adding blue hairspray to create the perfect Corpse Bride hair. For this look, Leah also chose to add a black floral headband to add another element to the undead aura of this character.
In this look, Leah opts for the Zombie White Cosplay Colored Lenses to mimic the vacant stare of Emily. Other options that you might want to explore for this look include the Mini Sclera White Colored Lenses or even the UV White Cosplay Colored Lenses if you’re attending an event with blacklight! All of these bright white choices are sure to enhance your Corpse Bride Halloween outfit within the blink of an eye.
We hope that this Tim Burton Corpse Bride makeup tutorial has given you some good ideas for creating your own take on this character for Halloween. Whether you choose to follow this tutorial step-by-step or put your own twist on the finished product, we’d love to see how your final result works out, so don’t forget to tag us on socials @funky_lenses!

